4/27/2010

Honey Mustand Italian Dressing

I love to make my own salad dressings.  You can whip up a fresh, tasty dressing at a moments notice, if you have a few pantry staples on hand.  Italian dressing is the most consumed dressing at my house.  It is a vinaigrette that really goes with everything! 
Making your own dressings, you can control the ingredients, they have no added chemicals, or preservatives or any other unwanted stabilizers or other junk!


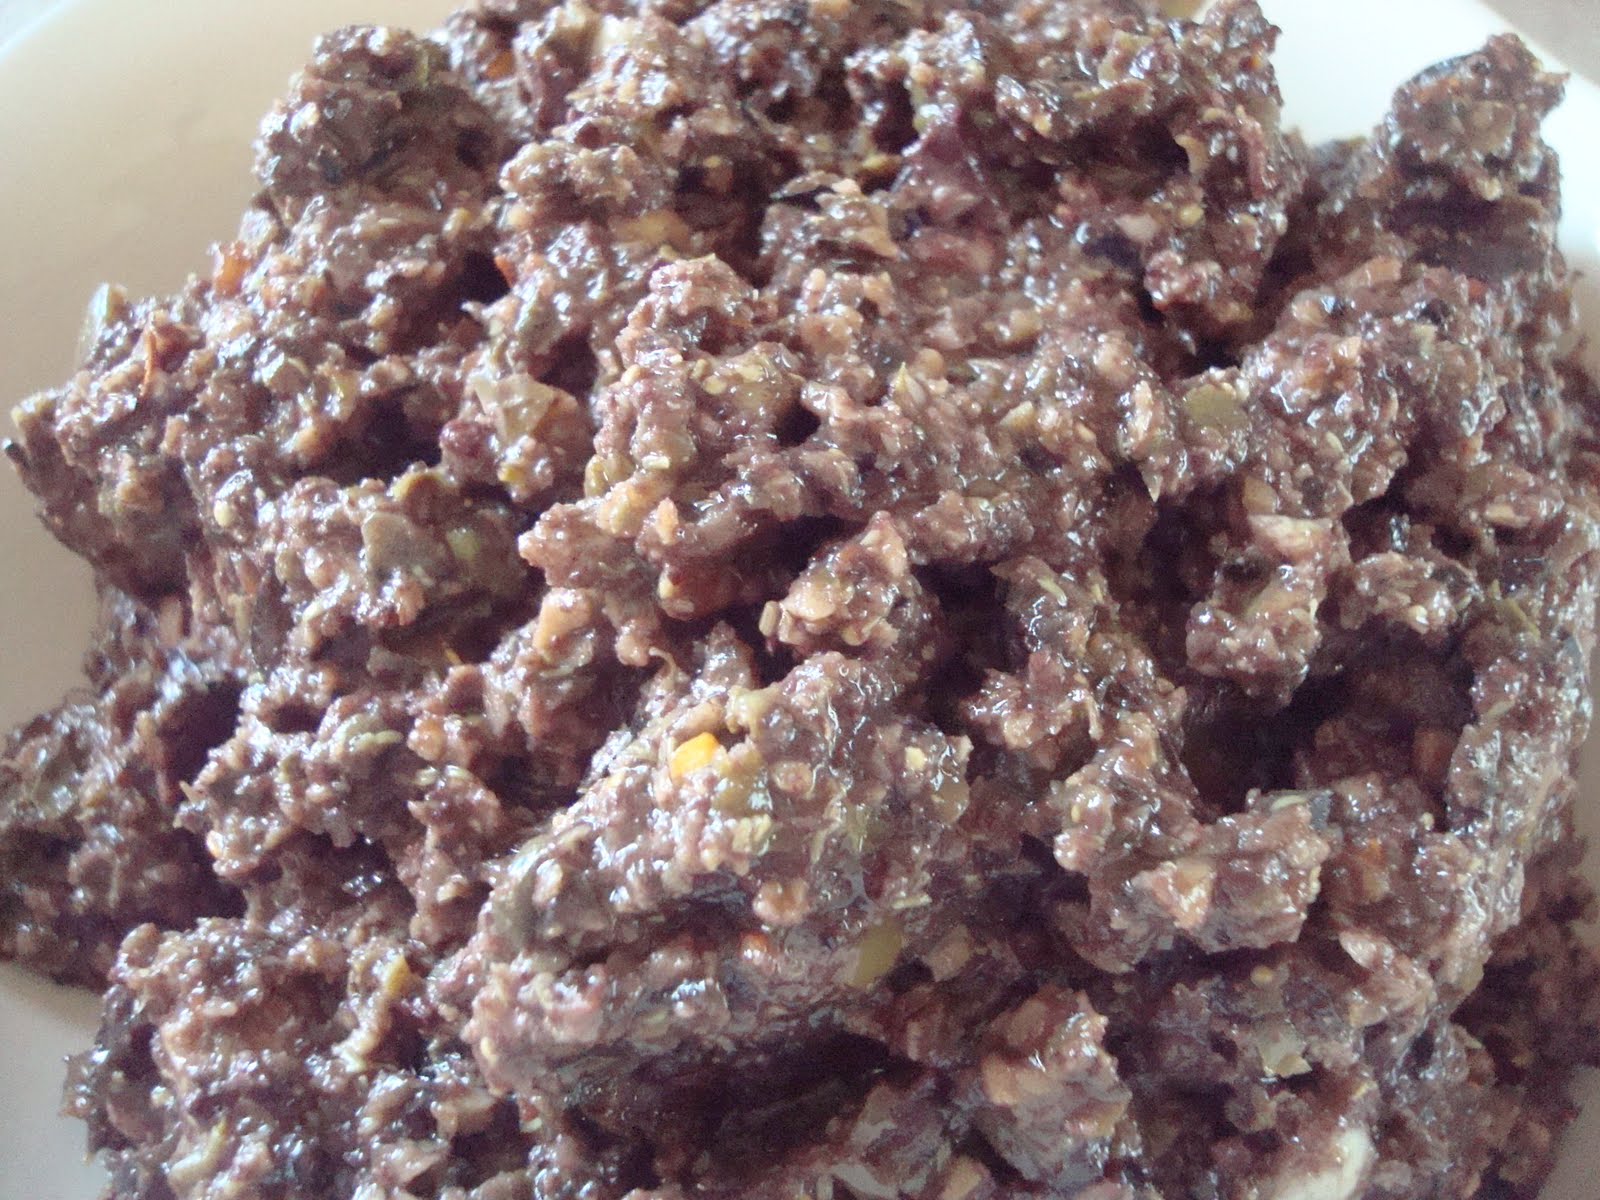
Honey Mustard Italian Dressing

1 C cold pressed olive oil
1/4 Bragg's Raw Apple Cider Vinegar
2 garlic cloves
1 small onion
1 TBL Dijon mustard
2 TBL raw honey
1 TBL Italian seasoning
1 tsp granulated garlic
1 tsp sea salt
1/4 tsp of celery salt
3-4 jiggers of hot sauce


Put the garlic cloves, and onion in the blender to chop first.  Then all all ingredients, except for the olive oil.  Blend until well incorporated, scraping down bits of garlic and onion as needed. 


Then while the blender is running, slowly add the olive oil in a stream.  This creates a well blended, and much creamier dressing.
Refrigerate for about an hour to allow flavors to meld.  Shake well before serving.


*I used Bragg's Raw Apple Cider Vinegar as my vinegar, and do for most of my dressings used at home.  It is a delicious, and healthful choice- that is raw, and is very nutritious.
*I used raw honey, Gentle Breeze Honey, which is local.  There are many health benefits of honey, but especially locally harvested raw honey!
*I used raw garlic, as I do in most of my dressings and dips, because of garlic's far reaching, miraculous healing properties!
*I used raw onion for the same reasons I use raw garlic.  Onions and garlic really are miracle foods, that are known cancer fighters and prevents.  I have the blood pressure of an athlete, and garlic and onions are one of the main reasons.  (As I am NOT an athlete.)  
*Italian seasoning is a blend of : oregano, marjoram, thyme, basil, rosemary, and sage.  The benefits of herbs and spices like these, have too many health benefits to even mention!  I could post a page of great healing benefits of each of these herbs... but didn't- today.  Know that herbs have ancient healing wisdom.  Use often, and liberally.

If you like a sweeter dressing, by all means add more honey.  If you prefer your Italian without the mustard, omit all together... If you like more of a vinaigrette that is clear, use garlic powder and onion powder, and do not blend with the blender, but shake in a jar, or whisk in a bowl.

This dressing is the bomb, and is super healthy to boot!
Enjoy!
Yours in health,
Natalie 


4/26/2010

Easy Bean Tostadas


Healthy meals do not have to be complicated!  We love Mexican inspired meals, and we all could eat Mexican every, single day.  I like to take short cuts, just like every other Mom.  You really can have really quick nutritious meals, it's just knowing what to buy.
Most of my meals, look like anyone else's- I just choose the 'healthier' options of what is already familiar.

Tostadas are one of our many "go-to" super easy, super nutritious meals.

Easy Bean Tostadas


organic corn tortillas
1 can of refried beans
vegan cheese shreds
organic sour cream (or vegan sour cream)
jar of jalapenos
salsa
chopped onion
any other toppings of choice!

I buy the uncooked organic corn tortillas from Whole Foods, or the Food for Life, sprouted grain corn tortillas.  The latter you can find at Outpost, or most health food stores.  I drizzle a bit of olive oil on each tortilla, then use a pastry brush to spread the oil on both sides of the tortilla.  I use my baking stone, which is by far, my favorite item in the kitchen! (Baking sheets have driven me crazy all of my life, until THE BAKING STONE.  Easy clean up, rinse with hot water, and scrape off any debris.  EASY.)  Then bake for about 10 minutes at 400 degrees.
Next, simply spoon a good amount of refried beans, straight from the can.  Top with vegan cheese, I used Daiya Vegan Cheese.  Bake for about 10 minutes, or until cheese is melted.  Top with your favorite toppings! You can use salsa, jalapenos, onions, avocado, guacamole, vegan or organic sour cream!
I used Organic Valley sour cream... I know, real sour cream?  I am not an advocate for dairy, as it causes many health problems, and we are all allergic to dairy- BUT, I am a huge sour cream fan, and have it occasionally.  This is the only dairy product I have in my home.  This is a pasture fed, and non-homogenized product, and the cultures help to predigest the 25 allergenic proteins of cow's milk.  In my family, we all can tolerate small amounts of sour cream.  If you can't tolerate any dairy, omit, or try vegan sour cream!

Enjoy!
Yours in health,
Natalie

4/24/2010

Tropical Smoothie


Knock-your-socks-off-smoothie right here folks!!  It tastes like the tropics, but can be whipped up in a matter of minutes in your blender!  I have many, many smoothie recipes- (in my mind, because I usually just wing it,) but this is one of our favorites in the warmer months.
This was an after school snack, BUT can be made for breakfast, OR for adults you could put in a little rum, vodka, or tequila!!  Oh yea!


Tropical Smoothie

1 banana
1 C frozen mango
1 C frozen pineapple
1/2 C of juice (o.j., mango, pineapple, or omit)
fill blender with coconut milk, or other dairy free milk, just until it reaches the top of the ingredients in the pitcher. 
1 tsp of probiotics

Blend in spurts until it is mixing well, then let it blend on high for a little while.  That's it!  Voila!


I used a frozen banana- after a banana is too ripe to eat, I throw it whole in the freezer to use for smoothies.  I simply warm it a bit with my hands, then peel and break into pieces.  I used organic mango from Trader Joe's, but you could use fresh, or even a frozen puree that you can find at the store.  The pineapple I took out of a bag of our favorite blends of frozen fruit, Dole's Wildly Nutritious Fruit Blend, that has strawberries, peaches, pineapple and mango in it!  I put whatever is frozen in first, and add whatever is softest last- then pour the juice and milk, then any add-ins.  Today I used Good Belly in Mango flavor as my juice.  It is a probiotic juice!  Then I added my favorite kids probiotic, Garden of Life Primal DefenseYep, a probiotic with a probiotic.  The latter is made up of soil organisms.
They think it is a rockin' special treat, when it really is a nutritional POWERHOUSE of magical nutrition!

If you add alcohol, you will think YOU ARE a magical POWERHOUSE.  While getting loads of healthy stuff in a cocktail!  It's a win, win here folks!  Many more smoothie recipes to come...

Yours in health,
Natalie

4/23/2010

Decadant Chocolate Coconut Milk Ice Cream!

This is a luscious, decadent, indulgence!  It is rich, creamy, and oh, so chocolaty, that will please even the most skeptical.  I choose coconut milk for ice creams, ( most often) as they have the closest 'mouth feel' to dairy ice cream.  This is due to it's high fat content- however, this is a healthy fat.  Let's clear up the 20 year misinformation that coconut oil and/or fat  is unhealthy, it is the contrary, it is very healthy!!

Making your own ice cream is so easy!  My Cuisinart Ice Cream Maker is one of my best investments in the kitchen- I love it!  At around $50.00, it has well paid for itself years ago!  At around $5 a pint for non-dairy ice creams, it is much more reasonable to make your own!  I watch for coconut milk to go on sale, and stock up!  Most recently, I found coconut milk, the Whole Foods 365 brand for only $1 a can!  Wha?  Yep, $1 a can, score!


Decadent Chocolate Coconut Milk Ice Cream

2 cans of coconut milk (or cashew cream, or other nut milks)
2/3 C of unsweetened cocoa powder
3/4 C organic sugar (or agave)
1 TBL vanilla extract
1 tsp sea salt
1/4 tsp xanthan gum (optional)


Blend in a blender, then cool in the fridge for an hour. ( It is excellent just like this, a sort-of mousse.)  Pour into your frozen ice cream maker bowl, and use your maker as directed.  Mine is for 25 minutes or so.  It will turn out like soft serve, and is fantastic!  You can freeze in an air tight container for a harder ice cream. 
This has an intense chocolate flavor- you can use less cocoa powder for a milder chocolate flavor.
Welcome to heaven my friend.
Enjoy!
Yours in health,
Natalie

4/22/2010

Tartar Sauce

It's easy to make your own tartar sauce!  You can control the ingredients, and tweak it just the way you like it!  Don't bother buying it in that little, expensive jar again!  You probably have the ingredients on hand at all times anyway!  I much prefer homemade to bottled any day.

Tartar Sauce

1 C mayonnaise
1/4 C  pickle relish
1/2 onion ( grated, or finely chopped)
1 garlic clove (grated or finely chopped)
1 tsp. Dijon mustard
1 tsp sea salt
couple jiggers of hot sauce

All ingredients into bowl, and blend.  Easy and delish.  Refrigerate to allow flavors to meld.

-I used a micro plane to grate the onion and garlic.  Man, I love a micro plane, no need to chop by hand, or pull out the chopper, and the pain of cleaning the chopper.
-In a pinch you certainly can use onion powder, couple tsp., and garlic powder, 1/2 tsp. will do.
-I used Trader Joe's mayo because it is all natural.  (My favorite, however, is Hellman's.  C'mon Hellman's come out with an organic please!!)
-I used organic pickle relish.  Have you ever read the label of regular relish?  Why do they have to put so much junk in regular foods?  You could finely chop organic pickles here too.
-You can omit the mustard if you prefer.
-A jigger is a good shake of the bottle.  The hot sauce in that small amount lends no heat, but nice flavor.  A jigger or 2, is a secret in many of my dips, dressings and the such.
-A couple of my favorite add ins are: 1 TBL of lemon juice, and or 2 TBL chopped capers.  Both add more great flavor.
-If you like restaurant tartar sauces that are sweeter, you could add a couple tsp. of honey, or organic sugar.


Next time you serve fish, or seafood, whip up some homemade tartar sauce.  You'll never buy jarred again!

Yours in health,
Natalie

4/21/2010

Natalie's Olive Tapenade

Like everything I make, I make it to my own tastes, this included!  I love olive tapenade- and it is so very versatile, and uses are endless!  I make it often in the Summer, as it makes a great dip, an excellent topping, a wonderful dish to pass at parties!  There are many, many recipes for olive tapenade, but in reality, you can make it pretty much any way you'd like.  It is at it's base, olives and capers that are chopped- what else you do with it, is up to you... This is the way I like to make it!


Natalie's Olive Tapenade

1  can black olives (7.75 oz.)
1 jar green olives (10 oz.)
1 jar kalamata olives (6 oz.)
1 jar capers (3.5 oz.)
2-5 garlic cloves
2 tsp. anchovy paste, (or 3-4 fillets)
2 tsp. mustard ( I used grainy brown)
1/2 C olive oil
Process the garlic cloves first in food processor, or blender.  Add the rest of the ingredients and chop coarsely.  
That's it!!
I like it coarsely blended, so you can see the different colors, or you can really process it a lot to make it creamy.  Today I blended it more than I usually do, so it is difficult to see all the different olives- oops.

*There are many additions you could do here, or things you can omit.  I love having the combo of olives, but you could omit any one of the 3... You can do less olive oil if you'd prefer it less of a dip, and more of a chopped topping.  You can add fresh lemon juice- which I often do when I make it fresh for company.  Today I added 2 tsp. of red pepper flakes, because I just wanted to make it with a little kick!
*This tapenade is again, so very versatile.  I use it often because I love olives!  My favorite way to use this tapenade is to top a rice cracker with goat cheese then the tapenade!!  I also love to use the tapenade in lieu of just olives, as in Mexican dishes- on tacos, on tostadas, and on top of my famous layered bean dip.  It is excellent on broiled fish, chicken, even on top of baked potatoes!  Great as a dip fresh veggies!
*Olives are NOT fattening, and are nutritional powerhouse, and have the HEALTHY FATS that your body and brain needs.  There are many healing properties to olives, garlic, olive oil- so enjoy without guilt!


Your family and friends will thank you.  This is gourmet taste, without the gourmet effort!
Yours in health,
Natalie

4/05/2010

Baba Ghanouj

This is one of my all time favorite dips!  It's hard to believe, that it was only about a year ago, when I first had the pleasure of trying it... My neighbor Meg's sister Margo, brought this fabulous dip to share, from one of her favorite gourmet stores.  (I love gourmet stores, and dips, but not the gourmet price!)  I had heard of the name "baba ghanouj", but thought it was perhaps an Indian inspired soup?  Boy was I wrong, and sorry that I never really knew what this was!
So, of course in the name of saving, and making it to my tastes, I have made this FAB dip many times.  I know there are many ways to make baba ghanouj, and most certainly have honed the recipe to my liking!
Here's the way I LOVE to make this dip!

Baba Ghanouj

1 med. eggplant
1-3 cloves garlic  
1-3 TBL tahini
2 TBL olive oil
2 TBL lemon juice
1 tsp sea salt
1 tsp cumin

Cut off the top of the eggplant, and cut in half length wise.  Brush the surface with olive oil, and sprinkle with salt.  Bake for 45 minutes at 400 degrees.
Put garlic in the food processor first, then add all of the other ingredients, and blend until desired consistency.
I use the entire eggplant, with the skin and all.  Most recipes call for only the inside of the eggplant.  I think this is a waste, of the very nutrient rich purple skin.  I think it is prettier, and more nutritious with the skin on.

I use at least 3 garlic cloves because I really love it garlicky- and only 1 TBL of the tahini... All of these ingredients can be adjusted to your own tastes!
Enjoy!

Yours in health,
Natalie

3/03/2010

Gluten free, Dairy free, Flourless, WAFFLES

Madeline loves a warm breakfast, but especially loves smelling it cooking as she gets ready for her day... So did I when I was little... in my dreams that is.  I was lucky if there was cereal in the house.  Right?  Man, my girls are lucky- but I do it because I love them so much! 
Who doesn't love waffles?  Today I experimented with using Kasha or buckwheat groats.  I know it is super nutritious, and is not even a grain!  It seems the more I read, that some grains aren't what they're 'cracked' up to be.  We all know that 100% grains and not refined, is the way to go.  But with more and and more research suggesting that wheat may not be compatible with our human bodies, and with so many having wheat and gluten intolerance, including myself, I am always rotating grains, and trying to find new ways to use them!

I had apple cider in my fridge from over the weekend.  To warm and serve to all of the little sledders and snowboarders... So I threw in 1/2 of cider to the batter to soak over night, to lend it's flavor.  It worked just fine!   My girls also love warmed apple cider in the morning- they pretend it is coffee.

This is an easy recipe where you soak your grains overnight.  I usually make all oat waffles, but today I threw in 1/2 kasha, and it worked just fine!  I bet you could use brown rice here too..?.. I'll let you know.

Whole Grain Sweet Potato Waffles

1 C oats
1 C buckwheat groats ( also called Kasha)
2 C coconut milk ( or other non dairy milk)
1/2 apple cider (or you can just use more milk here)
2 eggs
1/2 C sweet potato, mashed ( this was one medium, baked. You could use anything here: applesauce, pumpkin, shredded apple, mashed banana, blueberries, even strawberries!)
1 tsp pumpkin pie spice ( or spice to match your chosen fruit)
1 tsp sea salt
1 tsp baking soda

coconut oil (or other oil for greasing waffle iron)
100% maple syrup
Earth balance or Organic Smart balance buttery spread


Soak grains overnight in the milk, (and cider if using) with the salt at least 8 hours.  In the morning, blend for a minute or so, then add all the rest of the ingredients, and blend until just incorporated.  Do not over blend!
Preheat your waffle iron, and grease well.   I use a cool silicone pastry brush from Pampered Chef, that makes the job so easy! You can pour directly from the blender pitcher or whatever works best for you.  Cook as directed for your waffle maker.  Top with buttery spread and maple syrup, and watch 'em get gobbled up!


My waffle iron sucks, and I need to research and find one I love.  Mine is not easy for clean up, it gets so very hot, that I have to change cooking times the longer it is on... But I am from the school of thought, you use something until it no longer works- but this thing is old, and it won't die.  I'll have to donate it- and find a better one!  Any suggestions?

This batter makes exactly 6 waffles for my size waffle iron.  I will freeze the extras on a cookie sheet, then transfer to a freezer bag.  I won't have to mark the bag with the date, they will be gone this week.

Enjoy!
Yours in health,
Natalie

3/01/2010

BEST broccoli EVER

Roasted Broccoli with garlic and olive oil...  BEST BROCCOLI EVER!
Man I love broccoli, and most other vegetables!  I am fortunate, my daughters share my passion and love for vegetables... my husband, not so much.  He eats most veggies to humor me.  But, there are rare occasions when he ends up loving a vegetable!  This is one of those times!
I'm not sure if I was living under a rock, but I had never heard of 'roasting' broccoli.  I have back-in-the-day boiled broccoli, and for many, many years now, have steamed broccoli. 
I have roasted root vegetables, and absolutely adore roasted vegetables, but it never crossed my mind to roast broccoli!  I believe I was reading something in one of my many favorite magazines- something about roasted broccoli.  It hit me like a brick- you could ROAST broccoli?  I guess the 'leaves' part of the broccoli, made me think that roasting wouldn't work... BUT it does!
Roasting, like with every food stuff, allows the food item brown, and caramelize, kind-of.  Roasting imparts a tenderness and sweetness, unlike steaming.  Roasting just makes it almost a different vegetable.  (And I loved broccoli steamed anyway.) 
Now that I've roasted broccoli, I won't be going back to steaming it- possibly sauteing it, but not steaming.  No mo!
I've made roasted broccoli now many times, in different ways.  This is how I made it last night...

Roasted Broccoli

2 lbs. frozen broccoli (spears or florets)
1/4 C olive oil
2 tsp. Pampered Chef seasoning salt
1 TBL granulated garlic (or chopped or sliced fresh garlic)
fresh ground pepper


Preheat oven to 350 degrees, then roast for approx. 50 minutes.
Partially defrost broccoli.  ( I have just made this with frozen right from the freezer, and made with fresh broccoli.  You just adjust times as needed.)  Put broccoli on a jelly roll pan (that is a cookie sheet with a lip on it).  I used a baking stone jelly roll pan from Pampered Chef.  (I love baking stones!!)  Drizzle olive oil, and sprinkle seasonings.  Toss with hands.
Bake on middle to top rack.  After 25 minutes, toss broccoli.  Bake another 25 minutes.

You can roast at a higher temp. like 425 degrees, and bake for a total of 25 minutes.  I enjoyed the slower roast.  The ways to season are endless.  I love this with sliced or chopped fresh garlic.   You could use any seasoning blend of your choice in lieu of the pampered chef seasoning salt.  I've even used chili powder!  Another way to season it with bright flavor, is to grate lemon peel, squeeze lemon juice, and sprinkle with real Parmesan cheese from Italy AFTER roasting.  Magical.

I ate this as my main dish last night, and had this broccoli for a mid-morning snack eaten cold.  It is just that good!
Enjoy!
Yours in health,
Natalie

2/28/2010

Dairy free hot cocoa


My girls, although dairy free, do not miss out on much when it comes to food or drink... It is winter, and they LOVE to play outdoors, and go sledding, snow boarding, ice skating, or building a snowman.  So, hot cocoa, hot apple cider, chai, or hot tea is in order when they come in to warm up.  I have an easy recipe for hot cocoa that I use,  that they love! 
I grew up having dairy products, and regular hot cocoa in the easy to use canister.  I like this kind better.  I get the warm chocolaty goodness, without the guilt.

Dairy free hot cocoa

4 C unsweetened soy milk (any non dairy milk will do)
4 TBL agave nectar ( or organic cane sugar, brown rice syrup)
8 TBL unsweetened cocoa powder
1/8 tsp sea salt

Mix the soy milk and agave nectar, heat over a medium heat until just hot.  Stir in cocoa once the milk is hot.  I like to use a whisk- it makes the job much easier.  You can add cinnamon and nutmeg if you like, about 1/4 tsp. each.  I like to even do a little sprinkle of cayenne pepper for a bit of spice!

I hope this becomes a favorite at your house!
Yours in health,
Natalie

2/25/2010

Easy Hummus (Chickpea Dip)

Bean dip, any bean dip is a hit at my house!  Love to make it for family, or when having friends over... Had hummus at my recent Party lite party, and a friend asked me to post it- Thanks Tammy!  Here it is!


Easy Hummus

1 can chickpeas
2 cloves garlic
1 TBL tahini (sesame seed paste)
2 TBL lemon juice ( or juice of 1/2 lemon)
1/4 tsp cumin
2 drops hot sauce (optional)

I use a food processor but a blender would work just fine.  Blend the garlic first, or you could use a garlic press.  Then all of the ingredients blended together, until creamy!  That's it!  Delicious and EASY!  Serve with pita chips, or tortilla chips, or crackers, or veggies!

You can do so many variations here... I like to add 1/4 C kalamata olives, or 1/4 C black olives, or 1/4 C roasted red pepper!

This is one you will make over and over.  Your family and friends will love it! 

Enjoy!
Yours in health,
Natalie

2/23/2010

Pumpkin Walnut Pancakes

My daughters love having a warm breakfast.  Their favorites are pancakes, french toast, and waffles!  It is easy and quick to make any of these from scratch!  It cracks me up, that anyone spends money on pancake mix, when most often, we all have the few ingredients in our kitchen.
I love to add applesauce, banana, sweet potato, or pumpkin to pancakes, even waffles and french toast, to add more flavor, make it more fun, but mostly to make it more nutritious!   Today, I made pumpkin walnut pancakes.  This recipe is adapted from my Betty Crocker Cookbook that I received as a wedding gift, some 14 years ago...  I started cooking at 8 years old, taught by my Mom's OLD Betty Crocker Cookbook- I wonder where that copy ever went, it felt like a special friend...

These pancakes are so EASY to personalize- with toppings, different nuts, different additions, make gluten free, etc... Make some today!


Easy Pumpkin Walnut Pancakes

1  organic egg
1 cup whole wheat pastry flour (or gluten free all purpose baking flour, such as Bob's Old Mill)
3/4 C non dairy milk ( I used SO Delicious coconut milk, but soy, rice, almond, or oat milk would do)
1/4 - 1/2 C pumpkin (or applesauce, bananas, chopped fruit like apples, peaches or pears!)
1 TBL agave nectar ( maple syrup, raw honey, or organic cane sugar)
2 TBL cold pressed canola oil (or other cold pressed oil, I've even used olive oil here)
3 tsp baking powder
1/4 tsp sea salt
1/4 tsp pumpkin pie spice ( or apple pie spice, cinnamon, or vanilla)
1/2 C chopped walnuts ( or other nut, my fav here is pecans)

Earth Balance or Smart Balance
Coconut oil or other cold pressed oil for frying

Beat egg in a bowl until fluffy.  Add in remaining ingredients and mix just until incorporated.  Heat griddle or skillet over med. heat.  Use the coconut oil, or other oil to grease the pan/griddle.  Pour scant 1/4 C batter.  Cook pancakes until puffed and dry around the edges, with several bubbles coming up through the cake.
Turn and cook the other sides until golden brown.  The second side, seems to always cook more quickly!

-You can make these just plain pancakes, just do not add the fruit, nuts or spice.

-I love to use 1/2 oats and 1/2 flour to make super nutritious pancakes.  Use quick cooking oats if not making the batter the night before.  Regular oats work fine if you make the batter the night before!

-I usually do not add the nuts to the batter, I sprinkle on the pancake while cooking- putting more on mine and Julia's and less on Maddy's. 
-I like to make the pancake batter the night before, and put in the fridge so it is ready to go.  I do like the batter this way- it seems to soften the flour from the soaking.  I need to add a couple splashes more of the milk, because it gets thicker overnight.  The pancakes seem to take longer to cook when I make the batter the night before, so I start at a lower cooking temp. to allow the pancakes to cook through.
- I ALWAYS double, sometimes triple the recipe!  Doubling the recipe makes enough for my family for one meal, doubling the recipe makes enough pancakes for my daughters to have 3 meals.  I refrigerate the leftovers, then warm in the toaster.  You can freeze the cakes too.  You'll need to freeze them on a cookie sheet, after frozen, put them in a freezer safe container or bag.

Enjoy!
Yours in health,
Natalie

2/22/2010

Pumpkin Ice Cream

There are many dairy-free ice cream options at the super market, and especially at the health food stores, but it is so easy and economical to make your own ice cream!  I have a Cuisinart ice cream maker that makes it so very easy!  We've tried them all, but my personal favorite brand of 'ice cream' is Coconut Bliss.  However delish, the small container is close to 6 bucks, yikes.  So, with trial and error, came up with my own coconut 'ice cream' flavors, and this is one of my favorites!!

Pumpkin Ice Cream

2 cans coconut milk ( I used 365 organic from Whole Foods- never use lite)
1/2 C pumpkin
1/2 C agave nectar ( I used Wholesome Sweeteners Organic Raw Blue Agave, but you could use organic cane sugar, brown rice syrup, even maple syrup)
2 tsp. pumpkin pie spice
2 tsp. sea salt
1/2 tsp. xanthan gum (optional, makes it extra creamy)

I blended it in the blender, then put the blender pitcher in the fridge for about an hour to cool.  I poured the ingredients into the freezer bowl of the ice cream maker, and ran the machine for about 25 minutes.
You can eat immediately, or put into a freezer safe container.  I put salty pecans on top, and it was magical!


Enjoy!
Yours in health,
Natalie

2/15/2010

Brown Rice Crockpot Breakfast

I love my crockpot!  The uses are endless... The most underused purpose for this wonderful cooking tool, is breakfast.  Here is an easy and delicious, whole grain, gluten-free, vegan breakfast that will be waiting for you when you wake up!


Brown Rice Crockpot Breakfast:

1 C short grain brown rice
1 C rice, soy, or almond milk
1 C coconut milk (SO DELICIOUS vanilla)
1/2 C pumpkin (you could use applesauce, chopped apple, apple butter, pumpkin butter, etc.)
1/2 C walnuts (any nut you choose)
1/4 C raisins ( or any dried fruit, i.e. cranberries, dates, etc.)
1/4 C agave syrup ( or 100% maple syrup, or honey)
2 tsp. pumpkin pie spice ( or apple pie spice, or cinnamon)
1 tsp. sea salt
oil

Grease the inside of the crockpot with a bit of olive oil, or earth balance spread, or coconut oil.  Put all ingredients into the crock, mix well with a fork to incorporate the pumpkin.  Cook on low for 8 - 9 hours.

(My crock cooks fast/hot, so I cook this no more than 8 hours, and add an extra 1 C of water, and in the a.m. I need to add another 1 C of water.)


When you wake up, your house is perfumed with what smells like pumpkin pie ( or apple pie)!  AND no need to cook, your breakfast is ready!  Enjoy!

Yours in health,
Natalie

2/05/2010

Blueberry Maple Syrup recipe

My daughters love french toast, waffles, and pancakes!  These are their favorite breakfasts by far... To mix it up a bit, I like to serve fun syrups sometimes.  Blueberry and strawberry syrups, remind me of going to restaurtants that had a selection of syrups to choose from.  However, those syrups are junky to say the least.
Here is an easy, delicious way to make your very own berry syrups, that are not only healthy, but beautiful and delicious!  These syrups are great to serve to guests for breakfast, or brunch.


Blueberry Maple Syrup

1 1/2 C fresh or frozen blueberries (or strawberry, or mixed berry!)
   1/2 C maple syrup (100% real maple)
pinch of sea salt  (optional)

Warm in a pan on medium just until a few bubbles appear.  Take off the heat and allow to cool.  Either mash with a potato masher for a 'chunky' syrup, or put some or all into a blender.  I like that there is the actual fruit in the syrup, but you could strain the syrup if you prefer.  That's it!  Delish!

Enjoy!
Yours in health,
Natalie

1/29/2010

Chicken Curry Salad/ How to poach chicken

I adore chicken salad.  I especially adore curry chicken salad!  My favorite way to make chicken for salad is poached chicken, which renders the chicken especially tender.
 
Poached Chicken:

4 boneless chicken breasts
3 C water
1 tsp. Organic Better Than Bouillon chicken base
1/2 tsp. sea salt

Bring water and seasonings to a boil.  Gently add chicken breasts, and lower heat to low, where just barely a bubble or 2 pop up as it poaches.  Cook about 10 minutes.  Take off the heat and cover, and let stand another 10-15 minutes.  This makes perfectly poached chicken!

You can use plain water, but seasoned water is just so much better!   I save the broth that is left to use at a later date.  The poaching liquid is indeed a broth that would work nicely in making rice, or soup, or whatever.


Chicken Curry Salad:

4 chicken breasts (cubed, or shredded, I like cubed.)
1 1/2 C mayonaise
1 stalk celery chopped fine
1 small onion chopped fine
2 cloves garlic chopped fine or pressed  ( I like pressed.)
1 C raisins  ( I used purple today, but prefer golden in this salad.)
1 C chopped walnuts or pecans
2 tsp. curry powder
pinch of salt or to taste

Blend the mayo and the seasonings to make the dressing.  Add all of the other ingredients and mix until well blended.   Refridgerate at least an hour or overnight.  This is a taste explosion!

There are so many ways you could adjust this to your tastes.  You can add cubed apples or halved grapes in lieu of the raisins.  You can use any kind of nut you like.  I've used cashews, pecans, slivered almonds, and walnuts here.  This is an easy delicious way to use leftover chicken!

I like to make the day ahead, as it tastes so much better the next day, after all of the flavors can meld.  This makes a great sandwich, or served over a bed of lettuce.  Today I served the salad on toasted bread with avocado.  This sandwich really ROCKED!  Yum!

Enjoy!
Yours in health,
Natalie

1/28/2010

Examples of healthy cold lunches

My daughters eat cold lunches most often at school.  Although I do not consider hot lunches to be healthy, we do have an agreement... We look through the lunch menu for that month, and highlight what is a possible lunch.  If I say yes to that lunch, they agree to eat raw fruits and veggies from the salad bar.
When Madeline was in kindergarten, I didn't allow her to have one hot lunch.  I had no idea how important it was to her, to try the hot lunch.  In first grade, she sat me down to discuss hot lunches.  She said "couldn't I just have a couple lunches a month?  Lunches that aren't the worst?"  " You know Mom, it wouldn't kill me".  My little first grader was right... it wouldn't kill her, and it was so important to her, to be more like her peers.  I didn't realize just how important it is to fit it, and to be like your peers.  Madeline already struggled being different with her dairy allergy.  We came to an agreement that has worked.

Madeline is now in 5th grade, and knows more about nutrition, and healthy foods, than most adults.  Julia is in 3rd grade, and is by nature is a healthy eater, and deeply defends why we all need to eat healthy foods.  Julia has had the luxury of being allowed to have hot lunch, even in kindergarten.  The whole "it's not fair" starts very, very early.

Today I have a simple example of pretty classic cold lunches at our house.  Today Julia is having salad, and Maddy is having a healthy PB&J.


This is and organic peanut butter from Woodman's by the label Organics.  It is organic, which means it doesn't have the pesticides, and partially hydrogenated oils that regular peanut butter has.  Peanuts are the most toxic of non organic foods, as it is the most heavily sprayed with pesticides.  Regular peanuts, and peanut butter, are literally poisonious to children under 3.  Partially hydrogenated oils, are also toxic, and cause cell death, and is linked to many diseases.  It is worth every penny to buy organic peanut butter!  It is then a super nutritious food!


As you can see, we've used an organic jelly as well.  This isn't my favorite kind.  My well intended husband picked this one up.  I prefer an all fruit organic jam or spread that is void of sugar.  This brand will work just fine, but has added sugar.  I prefer to save the sugar content for a small treat, and not in the sandwich.

The bread I used today, is both of the girls favorite!( I think it is their favorite, because it is not grainy, and is most like the bread that their peers eat.)  It is Oatmeal from Natural Ovens Bakery.  http://www.naturalovens.com/  This brand is void of corn syrup, partially hydrogenated oils, and all the bad stuff.  A bonus, is that it is local!  I love to support local companies!  I switch off between breads, and most often use sprouted grain bread.  This bread makes it much more of a treat to them.


This is Julia's lunch today!  She asked for a salad.  Julia LOVES salads!  This is a salad blend with lettuce, carrots, and purple cabbage.  I add more of the purple cabbabe.  ( We always have purple cabbage on hand, as an add to salads, stir frys, and Madeline loves it as a snack- yep I'm serious.)  I added walnuts for protein, and omega 3's, and am serving it with my homemade Honey French dressing.
Today I am sending the girls with 2 cuties, which are tangerines.  I am sending them with water, as I usually do.  Once in a blue moon, I will send them with Silk chocolate milk, or 100% juice.  For snack I am sending a frozen fruit blend that they both LOVE.  This is the Dole Wildy Nutritious Mixed Fruit.  It is a blend of pineapple, strawberries, mango, and peaches.  Frozen fruit is so easy, and delicious for snacks, and for smoothies.  I put the fruit into a leak proof tupperware, and by snack time, it is starting to thaw, and is a treat to my daughters.  I buy this HUGE 6lb. bag at Sam's Club, because of the great price!  $8.50 or so!

I do get asked a lot about what brands I use, and where I shop.  That's why I will include much of that information on my blog.  I also hear a lot, that it is expensive to eat healthy, natural, and organic.  I disagree, if you shop wisely, shop the best prices, and shop the sales.  This is one way I have contributed to my family- bargain shopping, while feeding them well.

If you have any questions, do not hesitate!
Yours in health,
Natalie


1/22/2010

Chicken Veggie Stir Fry with Easy Oven Brown Rice

Who doesn't love a stir fry?!  My family loves a good stir fry- heck we even love a mediocre one!  Tonight I make a chicken stir fry with frozen veggies.  Sometimes I will cut all of the produce fresh... usually when we are having company.  It's not that my family isn't special- it's just the ease and hardly any prep time that makes the frozen vegetables so attractive.

There are so many great vegetable blends on the market now.  Tonight I used a Bird's Eye Broccoli Stir Fry vegetables.  It is my favorite.  It is a blend of broccoli, red peppers, onion, water chestnuts, and carrots.
For the chicken, I used boneless chicken breasts from Trader Joe's.  Not organic, but all natural.  I usually would use organic chicken, but I found this reasonably priced bag of chicken breasts and I love a bargain!

There are endless ways to make a stir fry.   It is easy, delicious, and healthy! This is what I made!


 Easy Chicken Veggie Stir Fry:

4 chicken breasts, cut into cubes
2- 16oz. bags
Bird's Eye Broccoli Stir Fry vegetables
1/2 bag of frozen chopped peppers and onions
3 cloves of crushed garlic
1 tsp. of jarred crushed ginger
1 tsp. sesame oil  (Tyling Naturals)
1/2 C of teriyaki sauce (San-J traditional Japanese)
splash of szechuan sauce (Wildtree all natural)
3 tsp. (approx.) coconut oil  (Nutiva organic cold pressed)
sesame seeds ( I used black, but optional)
  http://www.nutiva.com/coconutinfo.php


Saute crushed garlic in 1 tsp. coconut oil, for a few minutes, on medium heat.  Add cubed chicken, and cook and stir until no longer opaque.  Pour onto a plate when done.  Add 1 tsp. coconut oil, and saute the peppers and onions until cooked, about 4 minutes.  Pour onto a plate.  Add 1 tsp. of coconut oil, and add 2 bags of frozen veggies.  This will take time here folks.   I'd say around 10 minutes.  After the 10 minutes, add all ingredients back into pan, and add the teriyaki sauce, the sesame oil, and the szechuan sauce.  Cook until it is all warmed through.  I sprinkled black sesame seeds on top.  I served this over brown rice.


Easy Baked  Brown Rice:

Preheat oven to 375 degrees.  Grease a pan large enough to hold the amount of rice you desire to make.
(I used my dutch oven, that is ovenable up to 400 degrees.)

3 cups water
1 1/2 cup short grain brown rice
1 TBL organic Smart Balance buttery spread
1 tsp sea salt

Put rice into greased pan.  Bring water, Smart Balance and salt to the boil in a separate pan.  Pour over rice, stir to combine.  Cover, then bake for 1 hour.  When ready, uncover, and fluff with fork!  That's it!

I know, baked rice sounds unusual, but once you see how easy it is, this is the way you'll make it.  At least in the cold months.

There are many, many variations you could do with this rice.  You could easily double the recipe to use later in the week.  ( I did today, to use with chicken curry later.)  You could use broth or stock in lieu of the water, and add seasonings, and/or sauteed onion and garlic, to jazz up the rice.  It would be nice to jazz up the rice if you plan to use as a side dish.  The options are endless.

Enjoy!
Yours in health,
Natalie

1/21/2010

Honey French Dressing Recipe

Salad dressings are so easy to make!  What is so great about making your own things homemade is a.) you can control the ingredients, b.) make to your own tastes, c.) it most often better than store bought, and d.) it is far more cost effective (cheaper!). 

(As I write this, Kenny Chesney is on palladia singing " I go back".  Man, I love his music- what a talented song writer...)

I keep a stocked pantry ( I'd show you, but I have to clean and straighten it first) which is key to making any kind of dressing, at any time.
I remember years ago, when we'd go to many last minute pot lucks in our neighborhood. Our friends would find it so amazing that I could just run home, and put something together and return without going to the store.  I was known then for my salads, and dressings... because I always had the fixin's on hand!

Anywho, this is a family favorite, honey french dressing.  My daughter Julia's very favorite.  This is a recipe that appeals to most, because it tastes very much like bottled dressing.  I usually don't measure- again I am forced to use measuring utensils so I can share!  This is not only very tasty, but literally healthy


Natalie's Natural Honey French Salad Dressing:
1 cup olive oil  (365 cold pressed olive oil)
1/4 cup apple cider vinegar ( I prefer Bragg's Apple Cider Vinegar)
1/4 cup honey  ( I use raw and local)
1/4 cup  organic ketchup  (Trader Joe's)
1/8 tsp. worcestershire  (Annie's Naturals organic)
small squeeze of mustard  (  I used yellow today)
1 tsp. paprika  ( The Spice House)
1 tsp. Pampered Chef Onion Onion  (I usually use a shallot)
3 drops of tabasco
2 cloves of garlic

All the the ingredients into a blender except the olive oil.  Blend well.  Slowly pour olive oil in a stream as the blender is running.  Blend until thickened.  Chill for an hour for best flavor.  As you can see, I put it in a Good Season's Italian bottle- since I no longer use it for that dressing- and it is the perfect size for my recipes.  I bought an extra bottle at Goodwill! 

Any dressings can be shaken in a jar instead of blending in a blender, but I love how creamy and thick the blender makes the oils.  If you shake this recipe, make sure to crush or grate garlic first.

* I have used tomato paste in lieu of the ketchup, and is my preference.  But, ketchup is just easier.
* Bragg's Apple Cider vinegar is what I use most for dressings.  You could use any vinegar here.  The best flavor match would be red wine vinegar.  I use Bragg's most often because it is so very healthy, and RAW.
*  Raw Honey is a natural sugar, but I consider it a miracle food.  It has antibiotic properties, enzymes, micro nutrients, and is truly a super food.  Be sure to purchase an unprocessed, unheated brand of honey.

Once you try this recipe, you won't buy bottled French again... I hope:)  Enjoy!

Yours in health,
Natalie


Why you should avoid GMO dairy, soy, corn and wheat. Sobering.

A few favorite kitchen gagets